On-ramp
Via Polkaswap
Using ETH
Before getting started, make sure that:
- You have an Ethereum wallet compatible with Wallet Connect or Metamask installed in your browser with the Ethereum account that you wish to be using for MoonPay ready and connected, as tokens will be sent first to Ethereum, then to SORA using the HASHI bridge.
- You have enough ETH for the HASHI bridge transaction fees on the Ethereum network side.
- You are aware of MoonPay account limits and the KYC process.
Follow these steps to get started:
- Click the BUY TOKENS button to open the MoonPay purchase menu:
Select the Currency and Amount, then click Continue.
WARNING
Currently you can only buy DAI and ETH.
On the next screen, the Metamask extension will pop up a request for you to select an account (if you have multiple Metamask wallets). Once you confirm, MoonPay will automatically connect your Metamask account address.
- If everything is ok, click Continue.
- If the address is not the one you would like to be using, change the account in Metamask to the one you wish to be using.
Go through the KYC process.
INFO
You will have to do this only once. Every other time you will only have to enter the email address you submitted for verification. If you have already used MoonPay before, enter the email address you used.
Enter your credit card information, confirm that you agree with the Terms of Use and click Buy now.
TIP
If you're practicing on the testnet (test.polkaswap.io) use the following credit cards;
Visa 4000 0209 5159 5032 12/2022 123
Visa 4000 0209 5159 5032 12/2022 1
Wait for the transaction to be processed. You may close the window (and browser) safely at any time and come back to it later. You will also be notified via email by MoonPay once the transaction is completed or if there are any issues.
Once the tokens have been received in your Ethereum account (that is also actively connected to the Polkaswap site), the modal window to start the HASHI bridge transaction will appear automatically.
- Click START BRIDGE to move the tokens from Ethereum to SORA. Alternatively, you can close this window and begin the process at a later time (closing this window will not affect the transfer, you can still reach the transaction any time in Purchase History and start the bridge from there).
- Click PURCHASE HISTORY to review your transaction. You can click and view each transaction in detail, new and old, as well as start the bridge for any of the transactions that are ready and waiting.
When you are ready to transfer your funds to the SORA network, click START BRIDGE and then follow the usual steps for the HASHI bridge to move tokens from Ethereum to SORA.
Confirm the Ethereum network transaction:
Once the Ethereum network transaction has been processed, wait for the SORA network transaction to finish. This step takes longer as it is waiting for 30 block confirmations, hold on tight!
The little wait is worth it though, as once this is done you’ve successfully bought crypto with Style and Freedom directly from within Polkaswap using a credit card. Woohoo!
TIP
You can always go back and review any of the HASHI bridge transactions via the bridge history page.
You can also view all the purchases via the Purchase History page and access all of your bridge transactions from there.
Using KSM/DOT
- The process to onboard into SORA using KSM or DOT tokens is very similar, within the Hashi Bridge interface, click on the cog and choose the network you want to transfer your assets from. You can choose either Kusama or Polkadot.
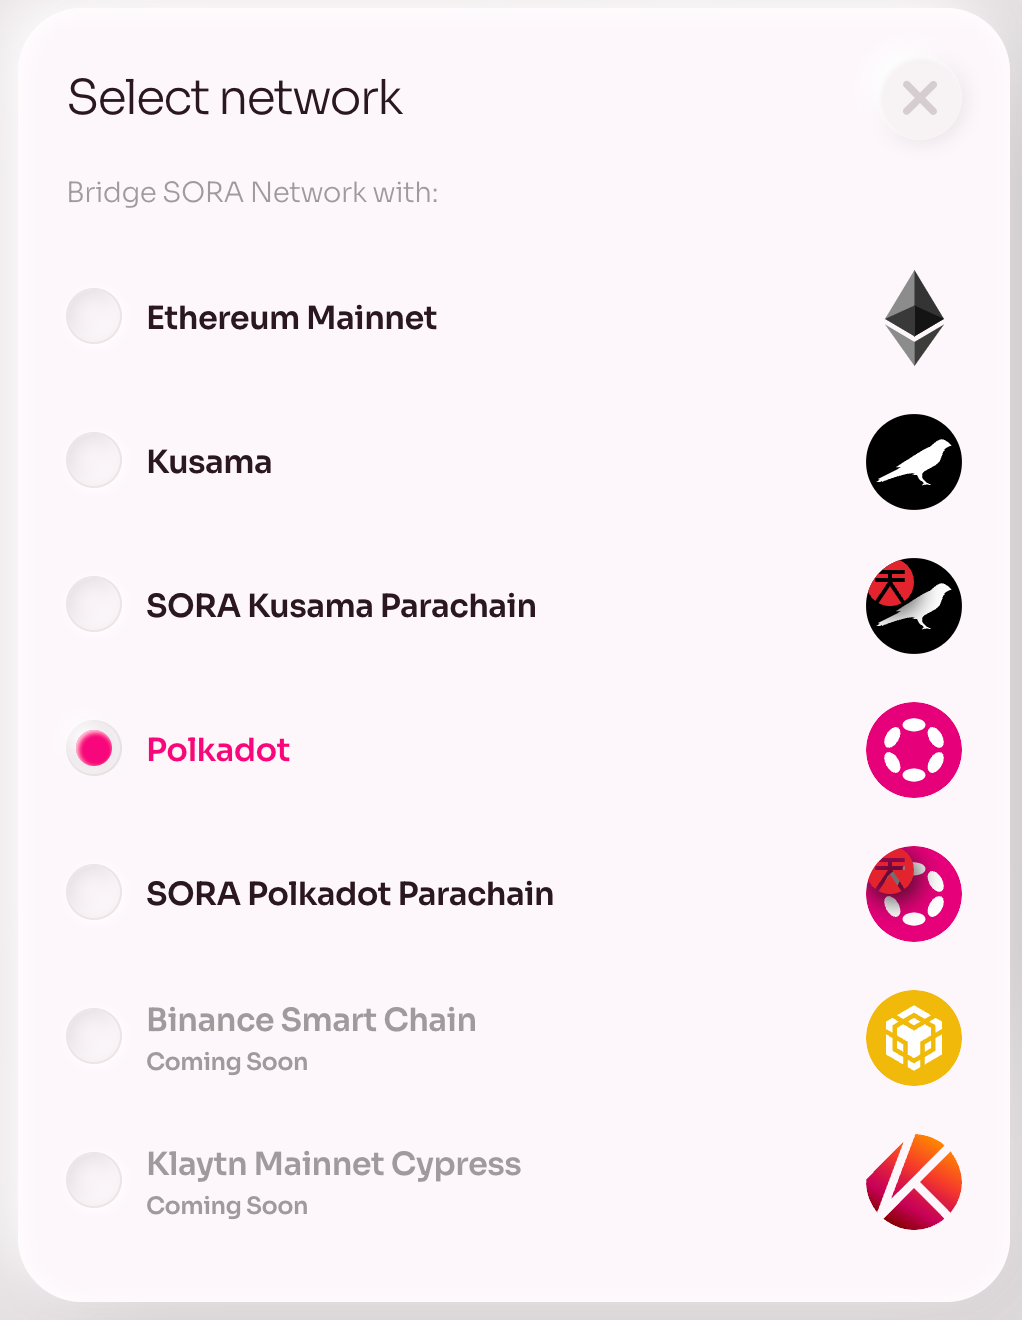
- Connect your Kusama or Polkadot account using Polkadot.js or another Polkadot-compatible browser extension such as Fearless Wallet and input the amount of DOT or KSM tokens to send.
![]()
- Click START BRIDGE and then follow the usual steps for the HASHI bridge to move tokens from Ethereum to SORA.
In case you experience any issues at all, please join the SORA Happiness group on Telegram.
Via Gatehub
You can now buy native XOR on Gatehub and send it to your SORA wallet quickly.
Onboarding
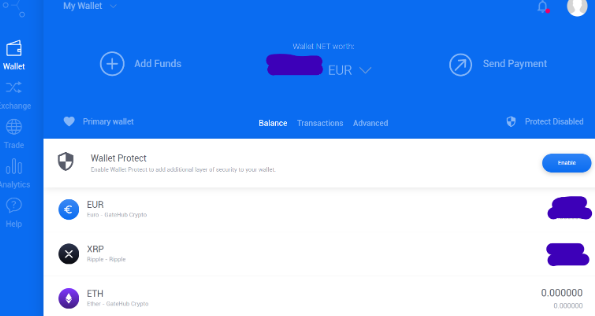
Go to gatehub.net, create an account and do KYC. You should experience a smooth onboarding process. Once you pass this process, you will have an XRPL Wallet (also referred to as Primary Wallet or My Wallet).
Here is a detailed description of account creation (registration) and a detailed description of KYC (account verification).
After onboarding, in order to be able to buy XOR for the first time, you need to do the following steps:
- Create a Hosted Wallet (one-time action for the first FIAT deposit).
- Deposit EUR funds using a card or SEPA bank transaction.
- Set a trustline (one-time action for the first FIAT deposit).
- Buy XOR with EUR / Exchange your EUR to XOR.
- Send XOR to your SORA wallet
Create a Hosted Wallet
The XRPL Wallet (also referred to as Primary Wallet or My Wallet) does not have XOR listed. You will need a Hosted Wallet to access XOR. After your first deposit, you will receive a 10 XRP welcome deposit, covering transaction fees when sending funds. You can not withdraw this welcome deposit.
- In the top left corner of the screen, click on My Wallet (= Primary Wallet).
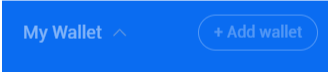
- Click on + Add Wallet.
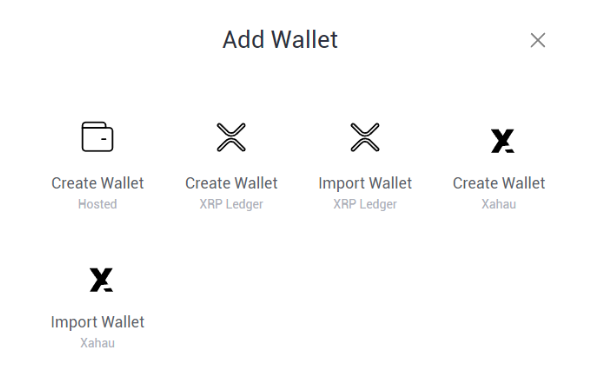
- Click on Create Wallet (Hosted).
- Name your wallet.
More details are available here
Deposit EUR funds
Go to the main screen of this Hosted Wallet and add EUR funds. Follow the straighforward steps. Here are detailed descriptions to Top up your card and make a SEPA EUR deposit.
INFO
Be careful: Before checking deposit instructions (SEPA or CARD), you need to choose “Hosted Wallet” on the left menu. Hosted Wallet and Primary/My Wallet have different message references for SEPA.
In case your EUR deposit arrives in the Primary/My Wallet section, this is how to move it to the Hosted Wallet:
First, copy the wallet address of your Hosted wallet (a 9 digit number).
Then choose
Primary/My Walleton the top left.Click on
Send Payment.Choose
Wallet - Wallet transfer.Enter your password (and 2FA if enabled).
Paste the Hosted Wallet address (the name of your hosted wallet should appear).
Chose EUR and the appropriate amount.
Confirm.
After confirmation, funds should appear in your Hosted Wallet in a matter of seconds.
Take a look at the detailed description for more information.
Set a trustline
After the first fiat deposit arrives, you will not see funds in your account yet. You will receive an email notification and notice a 10 XRP welcome deposit in your Primary Wallet.
To get fiat funds to your wallet, you must do the “set a trustline for Euro—GateHub Crypto” action and wait for some minutes or, in some cases, until the next working day for EUR funds to appear in your Hosted Wallet.
Here is a detailed description.
Exchange your EUR to XOR
Once the EUR is received and visible in your Hosted Wallet, you can exchange it for XOR under the Exchange tab.
- Choose
Hosted Walletin the top left corner - Click on
Exchangein the menu on the left - Choose EUR on the left and XOR on the right of the screen
- Choose amount of EUR under
You pay - Click on the
Exchangebutton on the right side of the screen
Take a look at the detailed description here.
Send XOR to your SORA wallet

Click on Send Payment in the wallet interface to send the XOR to your SORA Wallet by following the guidelines on the screen. Follow this detailed description for more information
Buying XOR on Gatehub is simple, but should you face any issues, contact the main SORA Telegram channel or SORA Support channel.
TIP
The admins will never send you direct messages. Any DM you receive regarding this process is a potential scam; for your safety, never interact with these accounts and never give away any private information about your account to anyone.